Almost there! You're $90.00 away from free shipping
Your Cart is Empty
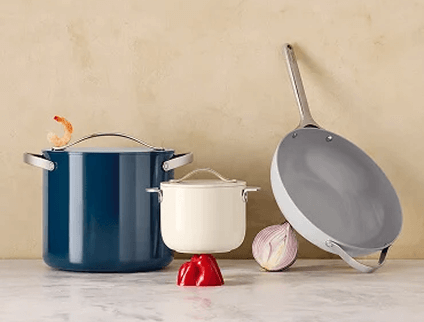
Get started with the Caraway essentials!
Free Shipping On Orders $90+
Free Returns
30-Day Trial
Home & Kitchen with Caraway
Key Takeaways
Seasoning creates a natural non-stick layer that prevents rust and improves with every use.
Choosing neutral, high-smoke-point oils and applying very thin coats builds the strongest finish.
Daily care, like wiping, drying, and lightly oiling, keeps cast iron reliable and easy to cook with.
At Caraway , we believe in crafting kitchen essentials that elevate your cooking and ensure it's done in the healthiest way possible. That's why we're diving into the world of cast iron, a beloved staple in kitchens worldwide.
Cast iron cookware holds a cherished spot on the stove and in the hearts of those who use it, thanks to its unparalleled ability to enhance the flavors and textures of our favorite dishes. However, to truly harness the potential of cast iron, understanding the art of seasoning is key.
Let's explore how a simple process can transform your cooking experience, ensuring your cast iron becomes a legacy item in your culinary collection.
Quick Steps
Scrub and dry your pan. Rub on a very thin layer of neutral oil, buffing until no shine remains. Bake it upside down at 450°F for 30 minutes. Cool and repeat 2–3 times for best results. After cooking, wipe a drop of oil on the warm pan to maintain the finish.
Cast iron is much more than just another metal. It's a piece of culinary heritage. Cast iron cookware is made from a unique alloy that retains and distributes heat exceptionally, making it ideal for everything from searing steaks to baking cornbread. Its durability means that, with proper care, it can last for generations.
The distinctive feature of cast iron is its raw, porous surface that, when seasoned, becomes a naturally non-stick cooking surface. This characteristic allows it to stand out in the kitchen, providing a versatile foundation for both high-heat cooking and slow simmering.
Seasoning is the key to unlocking the magic of traditional cast iron. The process involves coating the pan with a thin layer of oil and heating it to a point where the oil transforms into a protective polymer layer—this is known as polymerization . This layer not only gives cast iron its classic black patina but also creates a non-stick surface that improves with use.
Here are the benefits of a well-seasoned cast iron pan:
One of the most significant advantages of seasoning your cast iron is the development of a natural, non-stick coating . This seasoned layer forms when oil baked onto the cast iron polymerizes, creating a slick surface.
This feature allows you to cook with less oil, making your meals healthier and simplifying the cleaning process. Over time, as you continue to cook and re-season the skillet, this non-stick quality improves, turning your cast iron into a preferred tool for everything from frying eggs to crafting the perfect pancake.
Seasoning your cast iron acts as a barrier against moisture. By maintaining a well-seasoned layer, you protect the iron beneath from exposure to water, which can lead to rust.
This proactive approach not only prolongs the lifespan of your cookware but also ensures that it remains in excellent condition, ready to handle any recipe you throw at it.
A seasoned cast iron pan is like a fine wine; it gets better with age. Each cooking and seasoning session layers flavors into the pan's surface, contributing to richer, more complex tastes in your food.
This depth of flavor is something that newer pans can't replicate immediately. For those who love to cook, this means each meal prepared in your cast iron carries a hint of the dishes that came before, adding a unique touch to every bite.
In today's world, where health and safety in cooking surfaces are more important than ever, a well-seasoned cast iron pan offers a significant benefit. Unlike many modern non-stick surfaces that can emit harmful fumes when overheated, the natural seasoning on cast iron is completely chemical-free.
This makes it a safer option, particularly at high temperatures, ensuring your cooking environment remains as healthy as the food you prepare.
Before you start the seasoning process, gathering the right supplies will set you up for success.
Here's what you'll need:
Cast Iron Cookware: Whether it's a new cast iron skillet or an old favorite needing rejuvenation.
High Smoke Point Oil: Canola oil, flaxseed oil, or grapeseed oil are ideal due to their ability to withstand high temperatures without smoking excessively.
Paper Towel: To apply the oil evenly across the cooking surface.
Oven Mitts : Essential for handling hot cookware.
Aluminum Foil: Useful for lining the bottom rack of your oven to catch any drips and keep it clean.
If your pan is brand new, stripped bare after rust removal, or food is starting to stick, it’s time for a full oven seasoning. Start by scrubbing and drying the cookware completely. Any leftover moisture can cause rust.
Rub on an ultra-thin layer of neutral oil, buffing until there’s no visible shine. Place the pan upside down on the oven rack, with foil underneath to catch drips, and bake at 450°F for 30 minutes. Vent your kitchen since a little smoke is normal.
Once cooled, repeat the process 2–3 times for the strongest finish. Prefer a gentler approach? You can also do a single bake at 375°F for 60 minutes. A properly seasoned pan will have a dry, satin-black surface that feels smooth, not sticky. From here, everyday cooking only strengthens the patina.
We’ve talked about needing a high smoke point oil, but what does that actually mean? In plain terms, the smoke point is the temperature at which an oil starts breaking down, smoking, and leaving behind sticky residue instead of hard, protective seasoning. When you’re heating a pan up to 400–500°F, you want an oil that can handle that stress without turning rancid or tacky.
That’s why choosing the right oil matters as much as how you apply it. Here are the top picks that perform well for seasoning cast iron:
Canola oil: Neutral flavor, easy to find, and affordable. Smoke point hovers around 400°F, which makes it a reliable everyday option.
Grapeseed oil: Clean, light, and slightly higher smoke point (~420°F). A favorite for its balance of performance and accessibility.
Refined sunflower or safflower oil: Both sit around 440°F and are great for creating a smooth, durable finish. Just make sure you grab the refined versions; unrefined will burn out too fast.
Refined avocado oil: The heavy hitter at ~500°F. More of a splurge, but excellent if you already cook with it.
Flaxseed oil (optional/advanced): Known for creating a hard, glassy layer, but it’s temperamental and can flake under heavy use. Good if you want to experiment, but not essential.
Whatever oil you choose, the trick isn’t the type so much as the application. Always keep coats whisper-thin, and wipe until the pan looks almost dry. Season in multiple rounds instead of one thick coat. That’s how you get a satin-black, non-sticky finish that lasts.
Even with the best intentions, seasoning doesn’t always go perfectly the first time. The good news?
Most issues are easy to fix with a little know-how:
If your skillet feels gummy instead of smooth, it usually means too much oil was applied during seasoning. Cast iron loves whisper-thin coats, not glossy layers. To fix it, place the pan in a 450°F oven and bake it empty for one hour. This hardens the oil into a proper layer. Once cooled, lightly re-oil and buff until dry.
A little rust isn’t the end of the world. It often happens if moisture lingers after washing. To fix it, scrub the area with a chainmail scrubber or sponge and mild soap until the rust lifts. Dry the pan over heat, then re-season the affected spot or the whole pan if the rust was widespread.
Don’t panic if your skillet doesn’t look perfectly even. Blotchy or gray patches just mean the seasoning isn’t fully developed. Simply repeat one or two thin seasoning cycles, keeping coats very light. Over time, your pan will deepen into that classic satin-black finish.
If your eggs are clinging to the skillet, it’s not a sign of failure. It just means the patina needs more time to build. Try preheating the pan longer, add a little more fat when cooking, and avoid long acidic recipes (like tomato sauce) until the surface is stronger. Every use will improve it.
Seeing too much smoke during seasoning? It usually comes from too much oil or leftover grease that wasn’t buffed away. Next time, wipe the pan until it looks almost dry before baking. Always keep a window open or the fan running since a little smoke is normal.
Keeping your cast iron happy doesn’t need to be a big ritual. It’s really about quick, consistent care. After cooking, wipe out any residue with a paper towel. If something’s stuck, add a splash of water and loosen it gently, then dry the pan over low heat until all moisture is gone.
Rub in just 3–5 drops of a neutral oil, buff until the surface looks faintly glossy, and let it cool. It should never feel sticky. The more you use it, the better it gets. Think of cooking as part of the seasoning process.
Enameled cast iron is a different story. Because the interior is coated with a durable enamel, it doesn’t absorb oil and doesn’t need to be seasoned at all. Care is much simpler: wash with mild soap, dry thoroughly, and avoid sudden temperature changes that could cause the enamel to crack. That means don’t go from stovetop to cold water or freezer to hot oven.
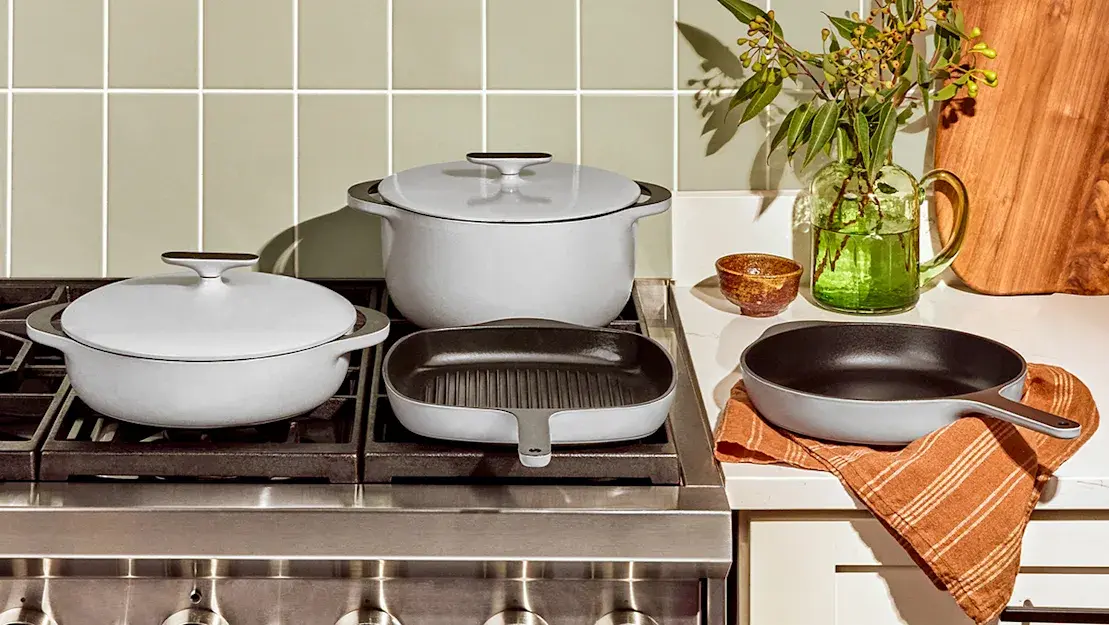
If you love the heft and heat retention of cast iron but want to skip the upkeep, enameled cookware is a low-maintenance alternative. It offers the same performance perks of steady heat and oven-to-table versatility without worrying about rust or sticky seasoning layers. For options that combine durability with style, explore Caraway’s enameled cast iron collection.
Neutral, high–smoke-point oils are best. Canola, grapeseed, sunflower, and refined avocado oil are reliable choices because they don’t burn easily and leave little flavor behind. Always apply the thinnest coat possible and wipe until it looks dry before baking. Flaxseed oil is an advanced option that polymerizes quickly, but it can flake under heavy use, so it’s not ideal for everyone.
The go-to method is baking at 450°F for 30 minutes, repeating 2–3 times for a durable finish. If you prefer a slower approach, try 375°F for 60 minutes, which gives a gentler bake. Both create a strong layer of seasoning, but multiple cycles at higher heat build a tougher, more resilient film that resists sticking and protects against rust.
No. Enameled cast iron has a glassy interior coating that doesn’t absorb oil, so it doesn’t need seasoning. Instead, care is as simple as washing, drying thoroughly, and avoiding thermal shock from sudden temperature changes. The enamel provides a non-stick surface on its own, making this type of cookware easier to maintain and ready to use straight from the box.
You don’t need to re-season on a strict schedule. Only do a full oven seasoning if your pan becomes sticky, rusty, or blotchy. Otherwise, light daily maintenance keeps the surface strong. Cooking with oils and fats naturally builds the seasoning over time, so regular use is the best way to maintain a healthy patina.
While the oven is the most foolproof way to season cast iron, it’s not your only option. If you don’t want to heat up the kitchen or you just prefer a quicker process, these alternatives can still get the job done.
For smaller pans or touch-ups, the stovetop works well. Warm the pan over low to medium heat, then rub in a drop or two of neutral oil with a paper towel.
Buff until the surface looks dry, not glossy. As the pan heats, the oil will polymerize into a thin layer of seasoning. Let it cool, then repeat the process two or three times for a stronger finish. This method is great for quick refreshes between oven cycles.
If you’re worried about smoke indoors, take it outside. A gas or charcoal grill can mimic the oven while keeping your kitchen clear. Apply the same thin coat of oil, place the pan upside down on the grates, close the lid, and heat at 450–500°F for 30 minutes.
Repeat for 2–3 cycles as needed. The grill’s even, high heat helps build a smooth, durable patina without setting off the smoke alarm.
Cast iron has its quirks, but a lot of the “rules” people repeat aren’t actually true. Here are a few myths worth setting straight:
A little mild soap won’t ruin your seasoning. As long as you rinse well and dry thoroughly, your pan will be just fine. The real danger isn’t soap but letting moisture linger, which can cause rust.
It’s true that simmering tomato sauce for hours in a brand-new skillet can eat into the seasoning, but short cooks are perfectly safe. Once your patina is built up, you can handle brief acidic recipes without worry. Just avoid long braises in wine or citrus until the finish is well established.
The opposite is true. Thick coats of oil bake into sticky, uneven layers. The best seasoning comes from ultra-thin coats, buffed until nearly dry, baked repeatedly. Think of it as slow layering, not piling it on all at once.
As we wrap up our guide on how to season cast iron in a few simple steps, remember that this enduring method prepares your skillet for a variety of dishes, from a perfectly seared steak to a crisp fried chicken, and enhances its lifetime and performance.
If you're looking for an even simpler solution that skips the seasoning but keeps the cook easy and clean, explore Caraway's line of enameled cast iron. Each piece features a non-toxic, enameled interior that guarantees a non-stick surface and adds vibrant style to any kitchen setup.
Dive into a world where style meets practicality and discover the joys of hassle-free cooking with Caraway's innovative cookware today.
Sources:
Cast iron | Definition, Composition, History, & Facts | Britannica
How to Season a Cast Iron Skillet | Cooking School | Food Network
Cookware Material: Seasoning | Century Life
Cooking Oils and Smoke Points: What to Know and How to Choose the Right Cooking Oil | MasterClass
Almost there! You're $90.00 away from free shipping
Get started with the Caraway essentials!
Free Shipping On Orders $90+
Free Returns
30-Day Trial